
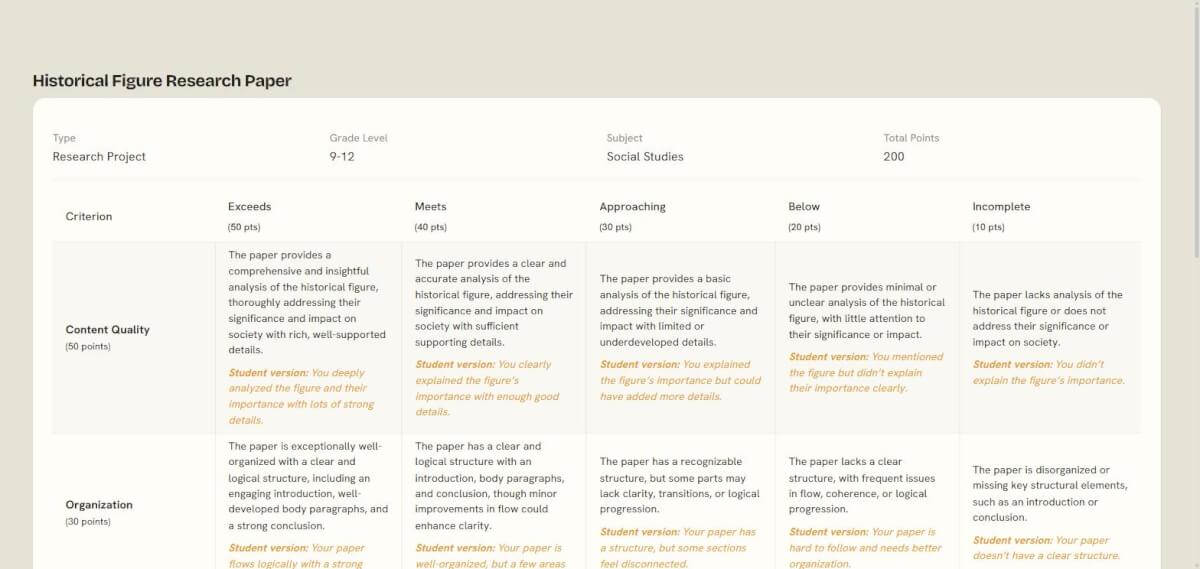
We’ve all handed out a rubric that made perfect sense to us, then watched students squint at it like it was written in another language. They ask, “How many details do I need?” or “Is this good enough for a 3?” and suddenly we realize the rubric is measuring compliance more than quality. If you’ve been wondering how to create a rubric that students can actually use while they work, not just after grades come back, the good news is that a few small shifts make a big difference.
For project-based learning, essays, presentations, and performance tasks in grades 3-12, the clearest rubrics do three things well: they start with the language of the standard, describe quality instead of counting parts, and keep the scoring levels simple enough for students to use. Let’s walk through a practical process we can use tomorrow.
How to Create a Rubric by Starting With the Standard
The strongest rubrics are not built from assignment directions alone. They’re built from what students are actually expected to know and do. That means our first stop is the standard.
Before writing any rubric row, look for the verbs in the standard. Those verbs tell us the skill we should assess. For example:
- Analyze how a theme develops
- Construct an argument supported by evidence
- Compare two approaches to solving a problem
- Explain the relationship between variables
Those verbs give us the heart of the rubric. If the standard says students should analyze, then our rubric should describe what stronger and weaker analysis looks like. If the standard says students should use evidence, then the rubric should describe how evidence is selected, connected, and explained.
This is where many rubrics drift off course. We end up scoring things like:
- Has 3 pieces of evidence
- Includes 5 paragraphs
- Uses color
- Turned in on time
Those may matter for task completion or work habits, but they do not necessarily tell us whether the student met the academic target.
If you want help identifying the key skills in a standard, PlanSpark's Standards Unpacker can help break the language down into teachable parts. And if you want a quick first draft of criteria, PlanSpark's Rubric Generator can create a standard-aligned rubric that we can then hand-tune for our students and assignment.
A simple question to ask before writing each rubric row
Ask: What would quality look like if a student really did this skill well?
Not: How many things would they include?
Not: Did they follow directions?
But: What would we see, hear, or read that shows strong performance?
That question keeps us focused on learning.
Describe Quality, Not Compliance
This is the shift that helps students most. A student-friendly rubric should describe the kind of work at each level, not just whether the student checked boxes.
Let’s say we are scoring a middle school literary analysis paragraph. A compliance-based row might say:
- 4 = Has 2 quotes
- 3 = Has 1 quote
- 2 = Has a quote but little explanation
- 1 = No quote
That looks tidy, but it does not actually describe strong analysis. A student could insert two random quotes and still not make a clear point.
A quality-based row sounds more like this:
- 4 = Selects strong evidence and clearly explains how it supports the claim
- 3 = Selects relevant evidence and explains its connection to the claim
- 2 = Uses some evidence, but the connection to the claim is weak or only partly explained
- 1 = Uses little or no relevant evidence, or does not explain how the evidence supports the claim
Now students can self-assess. They can ask, “Did I explain how my evidence supports my claim?” That is a much more useful question than, “Did I include enough quotes?”
What to avoid in rubric language
Watch out for words that sound official but do not help students picture what to do. Terms like adequate, sufficient,
Instead of:
- Provides adequate support
- Demonstrates good organization
- Includes sufficient detail
Try:
- Uses evidence that directly supports the claim
- Organizes ideas so each part builds logically on the last
- Includes details that clarify the idea for the reader or audience
The goal is language students can use during drafting, revising, rehearsing, or problem-solving.
Keep behavior separate from academic quality
If we need to score timeliness, participation, preparedness, or collaboration habits, it is usually better to score those separately from the academic rubric. Otherwise, a student’s understanding gets mixed together with work habits.
For example, in a 5th grade science explanation task, “turned in on time” should not sit beside “accurately explains cause and effect.” Those are different kinds of data.
That separation helps us give cleaner feedback and makes grades easier to defend to families and students.
The Right Number of Rubric Levels
When teachers ask me how to create a rubric that students can actually use, one of my first suggestions is this: keep the number of levels small. Three or four levels is plenty for most classroom assignments.
Too many levels create false precision. If students cannot clearly tell the difference between a 6 and a 7, the extra numbers are not helping.
Why three or four levels usually work best
- Students can understand them quickly. They can actually use the rubric while working.
- Teachers can score more consistently. Fewer levels mean clearer distinctions.
- Feedback gets sharper. We spend less time debating tiny point differences and more time describing next steps.
In most cases, I recommend one of these structures:
- Three levels: Beginning, Developing, Meeting
- Four levels: Beginning, Developing, Meeting, Extending
For younger students, labels like Not Yet, Almost There, Meets the Goal, and Above the Goal can be even clearer.
When to use three levels
Three levels work well when:
- The task is short
- You are introducing a new skill
- You want students focused on meeting the target
- You need a quick, consistent scoring tool
Example: a 3rd grade opinion paragraph, a 6th grade short constructed response, or a high school exit ticket explaining a concept.
When to use four levels
Four levels work well when:
- The task is more complex
- You want to distinguish meeting from exceeding
- You are scoring a longer project, essay, lab, or presentation
Example: a 7th grade research presentation, a 10th grade literary analysis essay, or an Algebra project explaining multiple solution methods.
In either case, avoid a level that simply says “perfect.” That often pushes us back toward rewarding polish or compliance. Instead, the top level should describe work that is especially effective, insightful, precise, or well-supported.
A Worked Example: From Vague to Student-Friendly
Let’s build one rubric row the way many of us actually do it: starting rough, then revising until students could self-assess with it.
Step 1: Start with the skill from the standard
Imagine a 9th grade argument writing standard asking students to support claims with relevant evidence and reasoning.
The key skills are:
- Make a claim
- Use relevant evidence
- Explain how the evidence supports the claim
Let’s focus on one rubric row: Use of Evidence and Reasoning.
Step 2: The too-vague version
Here is the kind of row we have all seen before:
- 4 = Excellent use of evidence
- 3 = Good use of evidence
- 2 = Some evidence
- 1 = Little evidence
The problem? Students do not know what counts as excellent, good, or some. Two teachers may not mean the same thing, either.
Step 3: The compliance version
Sometimes we try to fix that by counting:
- 4 = Includes 3 or more pieces of evidence
- 3 = Includes 2 pieces of evidence
- 2 = Includes 1 piece of evidence
- 1 = Includes no evidence
This is clearer, but still weak. It measures quantity, not quality. Three weak examples are not better than two well-chosen ones with strong explanation.
Step 4: The revised, quality-based version
Now let’s rewrite it so a student could use it while drafting:
- 4 - Extending: Uses strong, relevant evidence and clearly explains how each piece strengthens the claim. Reasoning shows clear insight.
- 3 - Meeting: Uses relevant evidence and explains how it supports the claim. Reasoning is clear and mostly complete.
- 2 - Developing: Uses some evidence, but it may be general, uneven, or not fully explained. Reasoning only partly connects evidence to the claim.
- 1 - Beginning: Uses little or no relevant evidence, or lists evidence without explaining how it supports the claim.
Now the differences are visible. Students can ask themselves:
- Is my evidence relevant?
- Did I explain how it supports my claim?
- Am I just dropping in evidence, or am I reasoning through it?
That is exactly what we want a rubric to do.
What makes this version stronger
- It is tied to the skill in the standard.
- It describes observable quality.
- It avoids counting as the main measure.
- It gives students language they can use to revise.
A Simple Process We Can Use for Any Rubric
If you want a repeatable approach for how to create a rubric, here is a practical sequence.
- Underline the verbs in the standard. These are the skills students must show.
- Choose 3-5 criteria. More than that can become overwhelming for students and for us.
- Name each criterion as a skill. For example: Explains reasoning, Uses evidence, Organizes ideas, Revises for clarity.
- Draft the “meeting” level first. Describe what successful work looks like.
- Then write the level above and below. Ask what is stronger, weaker, more complete, or less consistent.
- Use student-friendly wording. If students cannot self-assess with it, revise it.
- Test it on a sample. Can you and a colleague score the same piece similarly? Can a student identify what to improve?
A quick classroom test
Before finalizing a rubric, hand one row to students and ask, “What would a level 3 response look like?” If they cannot answer in plain language, the wording still needs work.
That one-minute check can save us a lot of confusion later.
Rubric Tips by Grade Band
Grades 3-5
Use short sentences, fewer criteria, and concrete language. Instead of “develops ideas,” say “adds details that help the reader understand.” Consider highlighting key words students can use during peer review.
Grades 6-8
Middle school students can handle more nuance, but they still benefit from clear, direct wording. Invite them to use the rubric to annotate a sample response before starting their own work.
Grades 9-12
High school students can use more discipline-specific language, especially in writing, science, and social studies. Still, clarity matters. “Reasoning thoroughly connects evidence to the claim” is stronger than “demonstrates sophisticated support.”
One Final Reminder
A rubric is not just a scoring sheet. It is a teaching tool. When we write criteria that describe quality, students can aim for something visible. They can plan, monitor, revise, and self-assess with more independence.
So if you’re revisiting how to create a rubric this year, start with the standard’s verbs, keep the levels to three or four, and rewrite vague rows until a student could actually use them. If you want a head start, PlanSpark's Rubric Generator can draft a standard-aligned rubric, and PlanSpark's Standards Unpacker can help us identify the exact skills we want to assess. Then we can do what teachers do best: fine-tune the language so it fits our students, our content, and the work in front of us.
Pick one upcoming assignment this week and revise just one rubric row using this process. Small changes in rubric language can lead to much clearer student work—and much better questions during revision.